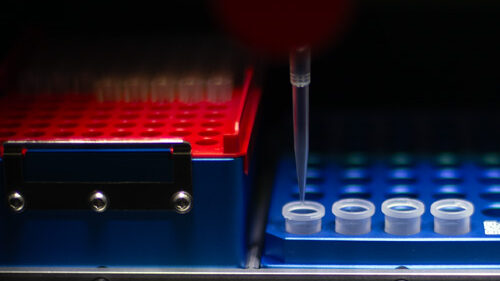
Automated Colony PCR Setup Using SQWERTY
Introduction
I’m Marina Product Manager at Singer Instruments and molecular microbiologist by trade, and these are my lab notes. I’m a relatively automated liquid handling newbie, and this report summarises my learnings with SQWERTY as I programme my first automated pipetting workflows.
PCR is a mainstay of modern molecular biology, so it seems like a good place to start. Its repetitiveness and sensitivity to human error make it an ideal candidate for lab automation.
This report outlines the key considerations when programming and running a colony PCR prep workflow on SQWERTY for three biological and technical replicates of E. coli, using JumpStart™ REDTaq® ReadyMix™ Reaction Mix. The protocol can be easily modified for different reagents and protocols for other hot start polymerases.

Procedure
Liquid class optimisation
Liquid handling parameters help achieve consistency by enabling an automated system to match the precise techniques used in manual pipetting. When a new liquid is encountered that has properties outside of the standardised protocols, settings can be adjusted and a new liquid class created for future workflows.
Before diving into the workflow programming, I spent some time optimising the liquid handling parameters for the JumpStart RedTaq ReadyMix. Since it’s thicker than water and tends to get bubbly even when pipetted manually, I used some old stock from the freezer to fine-tune the liquid class. Liquid class optimisation only needs to be done once per reagent. If you’re new to liquid classes, see our Beginners guide to automated liquid handling.
SQWERTY’s ‘Interactive’ mode was a lifesaver here, letting me tweak parameters in real-time without having to replay an entire workflow. That way I could repeat the aspiration and dispensing over and over and get the blowout flow rate just right to prevent any leftover liquid in the tip which is a huge time saver. And because I’m a bit of a control freak, I also double-checked that the default (water) liquid class was accurate enough for dispensing those watery resuspended colonies (spoiler alert: it was) and diluted primers (yep).
Building the workflow
Liquid class optimisation
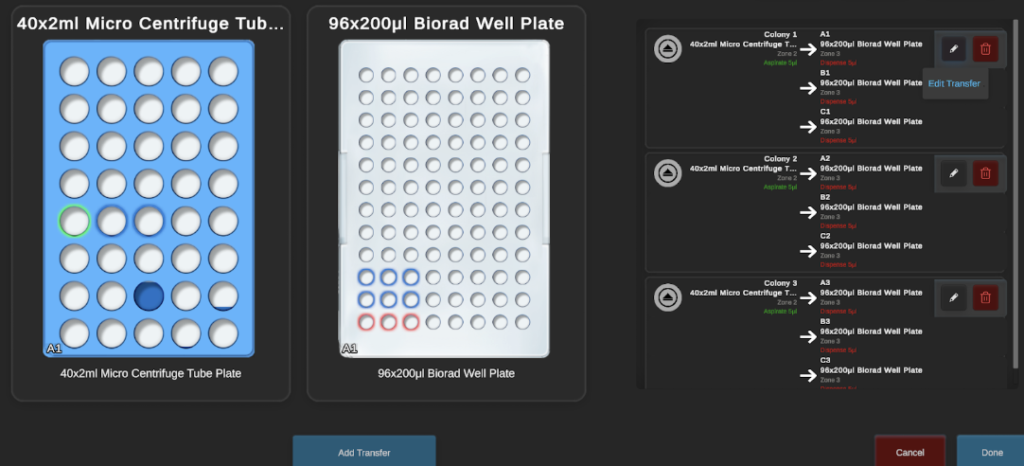
In SQWERTY, workflows are fundamentally broken down into a series of operations: mainly transfers, multi-dispensing (aliquoting) and serial dilutions.
To build out the workflow for PCR prep, I broke down the protocol into six distinct stages. This allowed me to test and re-test the settings for each stage without having to ‘replay’ the entire workflow every time.
Programmed operations can be as granular or grouped as wanted, but for ease of use and troubleshooting I recommend grouping similar tasks. For example, I could have created two operations for the pipetting of forward and reverse primers. But instead I used the same one for the transfer of both. This way, if you find an error later, it’s much easier to fix it and you’re less likely to miss anything. For a comprehensive explanation, see: How to optimise your liquid handling workflow.
Here’s a breakdown of the operations
1. Addition of JumpTaq ReadyMix to PCR MasterMix
A specialised liquid class was used for the JumpStart RedTaq ReadyMix to ensure accurate pipetting due to its viscosity. This included a 10 µL blowout, a dispensing speed of 149 µL/s, and a blowout flow rate of 149 µL/s, in contrast to the aspiration speed of 20 µL/s. Liquid level detection (pressure-based sensing) was enabled to sense the surface and precisely aspirate the ReadyMix to prevent carryover. Several aspirating/dispensing steps were performed due to 20 µL tip capacity. The tip was reused between steps as there was no observable residue within the tip.
2. Freeze ReadyMix
Following the successful transfer of the ReadyMix, a user action was added to prompt me to freeze the rest of the ReadyMix. This step is optional as the ReadyMix was transferred directly from the stock tube instead of transferring the volume required to a separate tube beforehand (+10% volume to account for pipetting errors).

3. Addition of water to PCR MasterMix
The default ‘water’ liquid class was used to aspirate and dispense water using a guided transfer. To save on tips, but avoid contaminating my water tip with the ReadyMix in the destination tube, the water was dispensed above the liquid level without ejecting the tip afterwards. A downstream mixing step was introduced to ensure homogenisation of the PCR MasterMix.
4. Addition of primers to PCR MasterMix
Forward and reverse primers from 20 µM stocks were pipetted into the MasterMix for a final concentration of 0.5 µM primers, using the default liquid class for water. Liquid level detection, a 1 µL traveling air gap to prevent drips, and a blowout were employed to ensure accurate pipetting. Following the addition of each primer, the PCR Mastermix was mixed using the full tip volume (20 µL) for five mixing cycles.
5. Addition of colonies/template to PCR plate
To save on tips used, three biological and three technical replicates of the resuspended colonies were transferred directly to the sterile 96-well PCR plate (BioRad) without touching the bottom of the plate.
During optimisation, I was able to ascertain the full volume (1 µL) was being repeatably pipetted up to three aspirate/dispense actions so I was able to plate three technical replicates with the same tip before ejecting the tip for the second biological replicate. The default ‘water’ liquid class and liquid level detection were used for colony suspension transfers to minimise carryover.
6. Addition of PCR MasterMix to 96-well PCR plate
19 µL of the previously homogenised MasterMix from step 4 was transferred to the BioRad PCR plate where colony resuspensions were already deposited. After each transfer, a mix was performed to ensure the template is sufficiently mixed in with the MasterMix. The tip was ejected after each mix.
7. Plate preparation complete
The plate is now ready to be put into a thermocycler. Finally, I repeated the same operations manually to see how comparable/accurate SQWERTY is to pipetting the same protocol manually.

Conclusion
Translating manual protocols to automated ones is very different to just trying out a new protocol by hand. SQWERTY relies on flexible programming of pipetting parameters to ensure it accurately pipettes different fluids. It doesn’t have the eyes or brains of a skilled pipettor, but the short-term effort necessary for optimisation adds up to much longer term gains.
My priorities for setting up this cPCR on SQWERTY were simple: accurate low-volume transfers of my template and minimum touch points. That’s why I went with five 20 µL transfers using 20 µL tips, instead of a single 100 µL transfer with a 200 µL tip. For me, the extra couple of minutes of robot time was worth not having to stop the run to swap out the pipette module and/or tips. For general use and a wider range of volumes, SQWERTY comes ready with the single-channel 250 µL pipette module, which covers a broad range of transfer volumes between 5-250 µL.
Bearing in mind those priorities, the protocol I chose took 17 minutes, which is admittedly slower than doing it manually, especially for a diagnosed RSI pipetting pro like myself. However, the benefit I got from using SQWERTY was mainly peace of mind: I didn’t have to worry about missing a well because I’m going numb or worry about whether or not my template actually got aspirated and dispensed from the tip.
The question we get asked all the time about SQWERTY is: “how fast can it set up an ‘xy’ reaction?” You’d think there’s a straightforward way to answer that. But the truth is, ‘it depends’. What do you value more? Speed or accuracy, speed or reliability, speed or repeatability, speed or savings on reagents, speed or saving on tips?
Reach out with your ideas and I’ll gladly share my learnings with you.
Looking for a small, simple pipetting robot with the versatility of your manual pipette?
It’s small enough to be put anywhere, simple enough to be used by anyone.

Marina Serdar, PhD | Product Manager
Singer Instruments
Marina’s role in the company is to bring together our multi-disciplinary team of scientists, designers and engineers to take ideas from concept to production.
Drawing on her academic background in molecular microbiology, her passion lies in harmonising scientific rigor with user experience to ensure Singer Instruments’ products are fit to empower researchers to push the boundaries of scientific discovery.